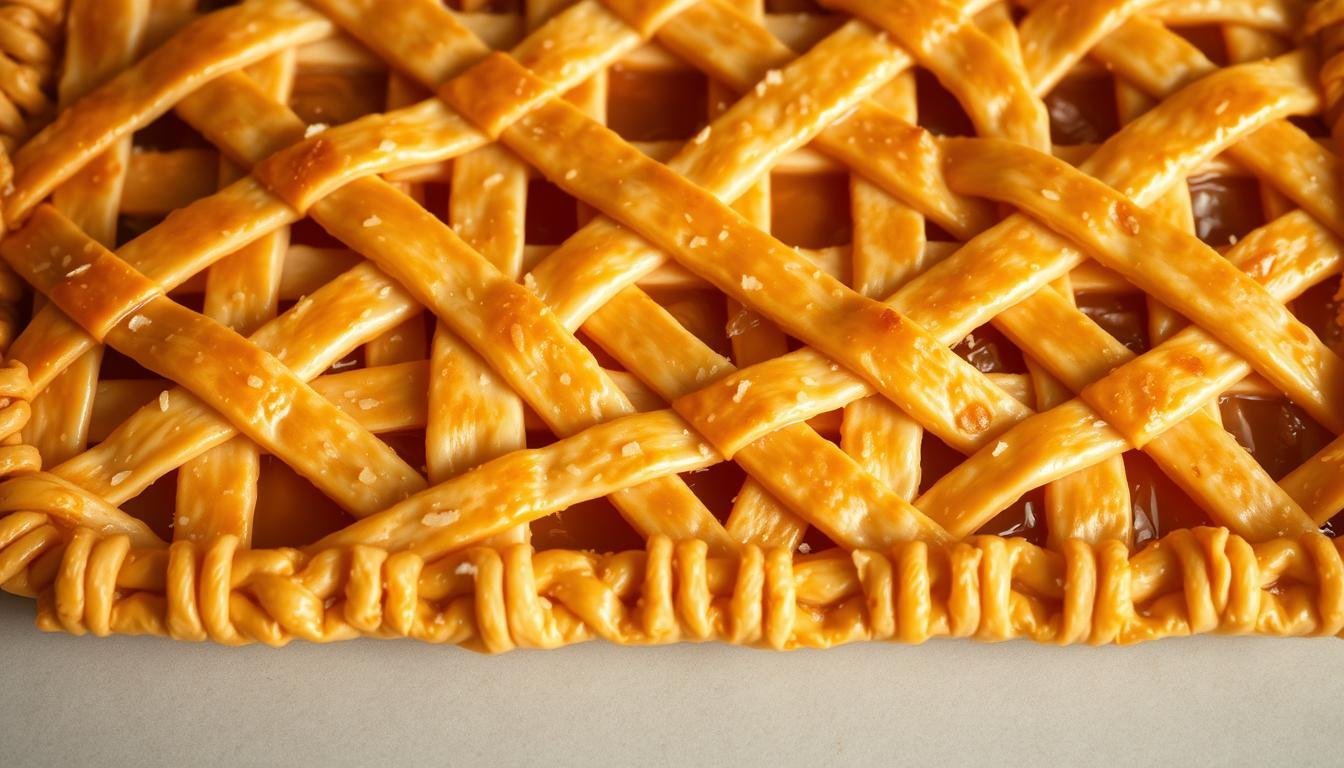
Creating a flaky pie crust is both an art and a science that relies on specific techniques and high-quality ingredients. To make a perfect quiche, you need a crust that’s light, flaky, and sturdy enough to hold your favorite fillings.
Understanding the science behind flakiness will help you achieve consistent results every time you make pie dough. By mastering the right techniques and using the best ingredients, you can create a crust that elevates any quiche recipe.
Table of Contents
Key Takeaways
- Master the art of making flaky pie crust with the right techniques and ingredients.
- Understand the science behind flakiness to achieve consistent results.
- Use high-quality ingredients to create a sturdy and delicious crust.
- Learn the 5 crucial secrets to perfect your quiche recipe.
- Transform an ordinary quiche into an extraordinary culinary experience.
The Science Behind a Truly Flaky Quiche Crust
The secret to a flaky quiche crust lies in understanding the science behind it. A flaky crust is achieved through a combination of factors including the ratio of fat to flour, the method of incorporating fats into the flour, the temperature of the ingredients, and the mixing technique.
What Makes a Pie Crust Flaky?
A pie crust becomes flaky due to the way fat and flour interact during mixing and baking. When butter or shortening remains in distinct pieces within the dough, these fat pockets create steam during baking. This steam forces the dough to separate into multiple layers, resulting in the characteristic flaky texture of a great quiche crust.
- The relationship between fat and flour is crucial for flakiness.
- Maintaining cold ingredients is essential for preserving distinct fat pieces.
- The right balance of gluten development is necessary for structure without toughness.
Flaky vs. Mealy Crusts: Understanding the Difference
Flaky crusts differ from mealy crusts in their mixing technique and final texture. Flaky crusts have visible butter pieces and create distinct layers, while mealy crusts have fats more thoroughly incorporated into the flour. Understanding this difference is key to making a quiche with the perfect crust.
By controlling factors like the temperature of the water and the mixing of the dough, you can achieve a flaky pie crust that’s ideal for your quiche recipe.
Essential Ingredients for Flaky Pie Crust for Quiche
Crafting the perfect flaky pie crust for quiche begins with understanding the essential ingredients. The quality and characteristics of these ingredients play a crucial role in determining the final texture and flavor of your quiche crust.
All-Purpose Flour: The Foundation
All-purpose flour is the backbone of a good pie crust. It provides the necessary structure through gluten formation without making the crust tough or chewy. The ideal protein content in all-purpose flour strikes a balance, making it the best choice for pie doughs.
Butter vs. Shortening: Finding the Perfect Balance
The debate between using butter or shortening in pie crust centers on their different properties. Butter offers rich flavor but melts quickly, while shortening provides stability with a higher melting point. Many bakers opt for a combination of both to achieve a balance of flavor and texture in their quiche crusts. Using cold unsalted butter is crucial for maintaining the dough’s temperature.

The Role of Salt and Sugar
Salt enhances flavor and strengthens the gluten structure, even in sweet pies. Sugar adds tenderness and aids in browning. Both ingredients are crucial for a well-rounded flavor profile and a perfectly baked crust.
Ice Water: Why Temperature Matters
Ice water is vital for keeping the fat cold throughout the mixing process, preventing it from melting prematurely and ensuring the crust remains flaky. The temperature of your ingredients dramatically affects the final texture of your crust, with colder ingredients producing flakier results.
By carefully selecting and measuring your ingredients, you can ensure a consistent and high-quality pie crust for your quiche. Measuring ingredients by weight rather than volume ensures accuracy and better results every time you make pie dough.
Equipment You’ll Need for Perfect Results
The right tools can make all the difference in creating a perfect quiche crust. To achieve a flaky and tender crust, you’ll need some essential equipment.
Essential Tools
To start, you’ll need a few basic tools. A quality rolling pin is perhaps the most essential tool for creating an evenly thick pie crust. You can use a food processor to quickly cut butter into flour without warming the ingredients. Alternatively, a pastry cutter offers more control and is an excellent option for those who prefer a hands-on approach. Pie weights and parchment paper are also necessary for blind baking quiche crusts.
| Tool | Purpose |
|---|---|
| Rolling Pin | Evenly roll out the dough |
| Food Processor | Cut butter into flour |
| Pastry Cutter | Mix ingredients by hand |
| Pie Weights & Parchment Paper | Blind baking quiche crusts |
Optional but Helpful Equipment
While not necessary, some additional tools can be helpful. Pastry cloths, silicone mats, and marble pastry boards can help maintain the cool temperature needed for perfect dough. These tools can be beneficial, but many successful pie crusts have been made with just basic kitchen tools and attention to technique.
The 5 Secrets to a Perfect Flaky Pie Crust for Quiche
Mastering the art of a flaky pie crust for quiche requires knowledge of five essential techniques. These secrets, refined by professional bakers over generations, are crucial for achieving a crust that is both tender and flaky.
Secret #1: Keep Everything Cold
Keeping all ingredients and equipment cold is crucial for maintaining distinct butter pieces in the dough, which create flaky layers during baking. Using cold butter and ice water ensures that the butter remains solid, preventing it from being absorbed into the flour. This results in a crust that is both tender and flaky.

Secret #2: Minimal Handling of the Dough
Minimal handling prevents overworking the dough and developing too much gluten, which would result in a tough rather than tender crust. By mixing the ingredients just until they come together, you preserve the delicate structure of the dough, ensuring a flaky crust.
Secret #3: The Butter Coating Technique
The butter coating technique involves coating a portion of the flour with fat before adding the remaining flour, creating a barrier that limits gluten development. This simple step guarantees a super flaky, light pie crust. By coating some of the flour with cold butter, you ensure that the dough remains tender and flaky.
| Technique | Benefit |
|---|---|
| Keep Everything Cold | Maintains distinct butter pieces for flaky layers |
| Minimal Handling | Prevents overworking the dough, reducing gluten development |
| Butter Coating Technique | Limits gluten development, ensuring a tender crust |
| Proper Resting Time | Allows gluten to relax, making the dough easier to roll |
| Blind Baking | Prevents the wet quiche filling from making the crust soggy |
Secret #4: Proper Resting Time
Proper resting time in the refrigerator allows gluten to relax and fats to firm up, making the dough easier to roll and enhancing flakiness. After it’s relaxed for 30 minutes, you can roll it out for your quiche recipe. This resting period is crucial for achieving a crust that is both flaky and tender.
Secret #5: Blind Baking for Quiche Success
Blind baking (pre-baking) is essential for quiche crusts to prevent the wet filling from making the bottom soggy. By pre-baking the crust, you ensure that it remains crispy and flaky, providing a perfect base for your quiche.
These five secrets work together as a system; implementing just one or two won’t yield the same exceptional results as following all five. By understanding and applying these techniques, you can achieve a perfectly flaky pie crust for your quiche.
Step-by-Step Instructions: Making the Dough
The foundation of a great quiche lies in its crust, and it all begins with making the dough. A well-crafted dough is the key to a flaky and tender crust that complements the filling perfectly.
Food Processor Method
Using a food processor can significantly simplify the process of making pie dough. To start, place flour and salt in the processor, then add cold butter. Pulse the mixture about 10 times until it resembles breadcrumbs.
With the processor running on low, slowly pour ice water into the tube feeder. Gradually increase the speed to high and blitz for 30 seconds, or until the mixture forms a ball of dough. If the dough doesn’t come together after 20 seconds, add an additional 1/2 tablespoon of water.
| Step | Action | Result |
|---|---|---|
| 1 | Pulse flour, salt, and butter | Breadcrumb-like mixture |
| 2 | Add ice water | Dough starts to form |
| 3 | Blitz until dough forms | Ball of dough |
The food processor method offers speed and consistency, reducing the risk of warming the ingredients with your hands during the mixing process.
Hand Mixing Method
For those who prefer a more traditional approach or don’t have a food processor, the hand mixing method is a viable alternative. Start by combining flour and salt in a bowl, then add cold butter. Use a pastry cutter or your fingertips to work the butter into the flour until the mixture resembles coarse crumbs.
Gradually add ice water, stirring with a fork until the dough begins to come together in a shaggy mass. Be cautious not to overwork the dough.
Both methods can produce excellent results, so choose based on your comfort level and available equipment.
Rolling Out and Shaping Your Crust
A well-rolled crust is essential for a delicious quiche, and it’s easier than you think. Once you have prepared your dough, the next step is to roll it out to the right size and shape for your quiche pan.
Preparing Your Surface
To prevent the dough from sticking, it’s crucial to prepare your surface properly. Sprinkle your work surface with flour, creating a light dusting that will help the dough roll out smoothly. Unwrap your dough and place it on the floured surface, then sprinkle the top with a bit more flour. This technique ensures that the dough doesn’t stick to your surface without incorporating too much additional flour into the dough.
Rolling Techniques for Even Thickness
To achieve an evenly thick crust, start rolling from the center of the dough and work your way outward in all directions. Rotate the dough frequently as you roll to prevent it from sticking to your surface and to ensure a circular shape. This method helps in achieving a uniform thickness throughout the crust, which is crucial for even baking.
Transferring to the Pan Without Tearing
Once your dough is rolled out to the desired thickness and size (about 27cm or 11″ round), it’s time to transfer it to your quiche pan or pie dish (23cm / 9″). Gently roll the pastry around your rolling pin, then unroll it over the pan. Press the pastry into the edges of the quiche pan, patching up any edges if necessary. Use your rolling pin to trim the excess pastry by rolling it across the top of the pan. This technique helps prevent tearing and ensures a clean edge.

Blind Baking Your Quiche Crust
To achieve a perfectly baked quiche crust, blind baking is essential. This process involves baking the crust before adding the filling, ensuring it remains crispy and flaky. Blind baking is crucial for preventing a soggy bottom, which can occur when the wet quiche filling is added to an unbaked crust.
Why Blind Baking is Essential for Quiche
Blind baking is absolutely essential for quiche crusts because the wet filling would otherwise make the bottom soggy and undercooked. The two-stage blind baking process ensures both structural integrity and proper browning of the crust. By baking the crust initially without the filling, you create a stable base that can hold the quiche filling without becoming soggy.
Using Pie Weights Effectively
To blind bake effectively, you need to use pie weights or alternatives like dried beans or uncooked rice. Place a large piece of parchment paper over the pastry, then fill with your chosen weights. This prevents the crust from puffing up and shrinking during the initial baking phase.
| Blind Baking Step | Purpose | Tips |
|---|---|---|
| Initial Baking with Weights | Prevents crust from puffing or shrinking | Use parchment paper and pie weights or dried beans |
| Second Baking Phase | Achieves light browning of the crust | Reduce oven temperature and bake until light golden |
Achieving the Perfect Pre-Bake
The perfect pre-bake for a quiche crust is just until the crust is set but not fully browned, as it will continue to cook when filled. Temperature management is important; starting with a higher temperature helps set the structure before reducing heat for the second phase of baking. Properly blind-baked crusts have a dry, slightly matte appearance, indicating they’re ready to receive the filling without becoming soggy.
After the initial 20 minutes of baking with weights, remove the crust from the oven and carefully take out the hot weights using the parchment paper. Return the crust to the oven at a reduced temperature (180C/350F or 160C/320F fan) for an additional 10 minutes, or until the base is light golden. This two-stage process ensures a perfectly baked crust for your quiche.
Troubleshooting Common Pie Crust Problems
Pie crust, while a staple in many desserts and savory dishes, can present several challenges, including crust shrinkage, sogginess, and toughness, which can be mitigated with the right techniques. Understanding these issues and their solutions is crucial for achieving a perfectly baked quiche or pie.
Shrinking Crust: Causes and Solutions
A shrinking crust can be frustrating, but it’s often caused by gluten development and stretching during rolling. To prevent this, ensure your dough gets proper resting time, and avoid stretching it when fitting it to the pan. This simple adjustment can significantly reduce crust shrinkage.
Soggy Bottom: Prevention Techniques
A soggy bottom can ruin an otherwise perfect pie. This issue can be prevented through proper blind baking techniques, using a higher initial oven temperature, and ensuring the crust is properly sealed. By following these steps, you can achieve a crispy crust that complements your filling.
Tough Crust: How to Keep it Tender
Tough crusts often result from overworking the dough or using too much water. To keep your crust tender, maintain visible fat pieces and handle the dough minimally. This approach ensures your pie crust remains flaky and tender, perfect for your quiche or pie.
Storage and Make-Ahead Options
Proper storage of pie dough is crucial for achieving the perfect quiche crust. Understanding the various storage options can save time and reduce stress when preparing quiches for special occasions or busy weeknights.
Refrigerating Pie Dough
Refrigerating pie dough is ideal for short-term storage, typically up to 5-7 days. To maintain freshness, wrap the dough tightly in plastic wrap to prevent it from drying out or absorbing refrigerator odors. Before using, allow the dough to warm up on the counter for 15 minutes, and give it a few kneads to restore its pliability.
Freezing Instructions
For longer storage, freezing is an excellent option. Wrap the dough discs in plastic wrap and place them in zip-top freezer bags. This method allows for storage of up to two months. When you’re ready to use the dough, thaw it in the refrigerator for 24 hours or on the countertop for an hour.
Pre-Baked Crust Storage
Pre-baked crusts can be stored at room temperature for 1-2 days or frozen for up to a month. This flexibility makes it convenient to prepare quiches quickly. Simply thaw frozen crusts at room temperature or in the refrigerator before filling and baking.
By utilizing these storage and make-ahead options, you can enjoy the flexibility to prepare quiches at your convenience, whether it’s for a special occasion or a busy weeknight meal.
Recipe Variations and Adaptations
With simple modifications, this pie dough can be used for a variety of sweet and savory applications. You can adapt it for different recipes by changing ingredients. For savory quiche, add herbs like thyme or rosemary to the dough, or incorporate grated hard cheese.

- Substitute whole wheat or alternative flours for up to half of the all-purpose flour for added nutrition.
- Use lard instead of shortening for a flakier crust in savory applications.
- Add a small amount of acid to the ice water to inhibit gluten formation.
Experimenting with different fats can create unique flavor profiles for your pie.
Conclusion
Elevate your quiche game with a perfectly crafted pie crust. Mastering the art of flaky crust opens up endless possibilities for creating impressive homemade meals. By applying the five secrets – keeping ingredients cold, minimal handling, the butter coating technique, proper resting time, and blind baking – you’ll achieve consistently excellent results. With practice, you’ll develop a feel for the pie dough. Quality ingredients, like good butter and ice water, make a noticeable difference. Store your pie dough in the freezer for quick access to homemade quiche.
FAQ
What is the best type of flour to use when making a quiche crust?
All-purpose flour is the best choice due to its balanced protein content, which provides structure without making the crust too tough.
How do I prevent my quiche crust from becoming soggy?
Blind baking with pie weights or dried beans can help prevent the crust from becoming soggy by ensuring it is pre-baked to a golden brown before adding the filling.
Can I make quiche crust ahead of time?
Yes, you can refrigerate or freeze the dough. Refrigerating allows for up to 2 days of storage, while freezing can preserve the dough for several months.
Why is it essential to keep the butter and water cold when making the crust?
Cold ingredients help create a flaky texture by preventing the butter from melting and mixing too thoroughly with the flour, resulting in a tender and layered crust.
How do I achieve an even thickness when rolling out the crust?
Using a rolling pin and rotating the dough as you roll can help achieve an even thickness, reducing the risk of overworking the dough.
What is the purpose of using parchment paper when blind baking?
Parchment paper prevents the pie weights or dried beans from coming into direct contact with the crust, making it easier to remove them after baking.
Can I use a food processor to mix the dough?
Yes, a food processor can be used to mix the dough, but be cautious not to overprocess, as this can lead to a tough crust.
How long should I blind bake my quiche crust?
The blind baking time will vary, but typically it takes around 15-20 minutes, or until the crust is lightly golden and set.

https://amzn.to/41VKJ94
- Borosilicate glass construction withstands extreme temperature changes without the risk of cracking or shattering
- Generous rim offers a safe and comfortable grip
- Easy-read 9” dimension marking
- Perfect for pies, quiches, crumbles and more
- Leak-proof, Microwave, dishwasher, and freezer safe