Struggling with tough or bland pie crusts? You’re not alone.
Many bakers have pulled what looks like a perfect pie from the oven, only to be disappointed by a dense, flavorless base. But there’s a simple, time-tested solution: Pie Crust with Vinegar.
Adding a splash of vinegar to your dough isn’t just an old trick—it’s a proven method that helps control gluten formation, resulting in a flakier, more tender crust. Generations of home bakers and professionals alike rely on this secret to create perfectly crisp layers, whether for sweet fruit pies or savory quiches.
Say goodbye to crumbly disasters and hello to foolproof, bakery-style crusts. With this vinegar-enhanced technique, your pie game is about to get a delicious upgrade.
Table of Contents
Ingredients & Essential Tools for a Perfect Pie Crust
Creating a flawless pastry foundation begins with selecting premium components and reliable implements. Every choice—from your flour type to mixing tools—directly shapes the dough’s texture and handling. Let’s explore what separates ordinary results from bakery-worthy creations.

Key Ingredients
Pastry flour outperforms all-purpose flour with its lower protein content (8-9% vs 10-12%), producing tender layers. Combine 3 cups with ½ teaspoon salt for balanced flavor. The magic happens when cold unsalted butter meets shortening—½ cup each creates ideal flakiness without greasiness.
Ice-cold water (½ cup) keeps fats firm during mixing. A tablespoon of acidic liquid, like white vinegar, adds subtle tang while limiting gluten formation. Measure precisely using standard cups and spoons for consistent results.
Must-Have Equipment
A sturdy pastry cutter blends fats into flour without overworking the dough. Use a large bowl (minimum 4 quarts) for proper air circulation. Your rolling pin should have smooth, weighted handles for even pressure distribution.
Non-reactive metal or glass bowls prevent flavor transfer. A 9-inch pie pan with sloped sides ensures even baking. Avoid thin aluminum—it warps under high heat, creating uneven browning.
Mastering the Art of Pie Crust with Vinegar
What if one common kitchen ingredient could turn your pastry from tough to tender? Acidic components work behind the scenes to transform dough textures. Professional bakers rely on this method to achieve consistent results without specialized tools.

Vinegar: The Secret Ingredient
The magic happens when acid meets gluten proteins in flour. Vinegar’s acidity weakens these bonds, creating softer layers. You’ll use just enough to tenderize without altering flavors—1 tablespoon per double batch balances science and taste.
Mix vinegar with ice water before adding to dry ingredients. This timing ensures even distribution while keeping fats cold. Your dough becomes more pliable, resisting cracks during rolling.
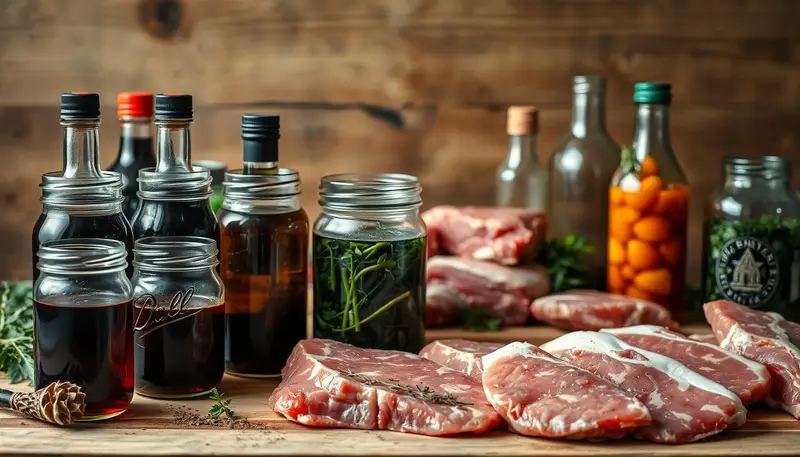
Choosing the Right Vinegar
White and apple cider varieties both deliver results. The table below clarifies their differences:
| Type | Acidity Level | Flavor Impact | Best For |
|---|---|---|---|
| White Vinegar | 5% | Neutral | All recipes |
| Cider Vinegar | 5% | Subtle apple notes | Fruit-based fillings |
White vinegar suits savory dishes, while cider complements autumn pies. Either option prevents overdeveloped gluten—the main cause of chewiness. Keep your chosen variety beside flour and salt for efficient prep.
Remember: Vodka achieves similar effects but evaporates differently. Stick with vinegar for foolproof texture every time. Your dough will thank you with flaky layers that shatter at first bite.
Mixing Techniques: Pastry Cutter vs Food Processor
What separates a crumbly disaster from a shatteringly crisp masterpiece? Your mixing method holds the answer. Two distinct approaches dominate kitchens today, each offering unique advantages for dough texture and efficiency.

Comparing Traditional and Modern Methods
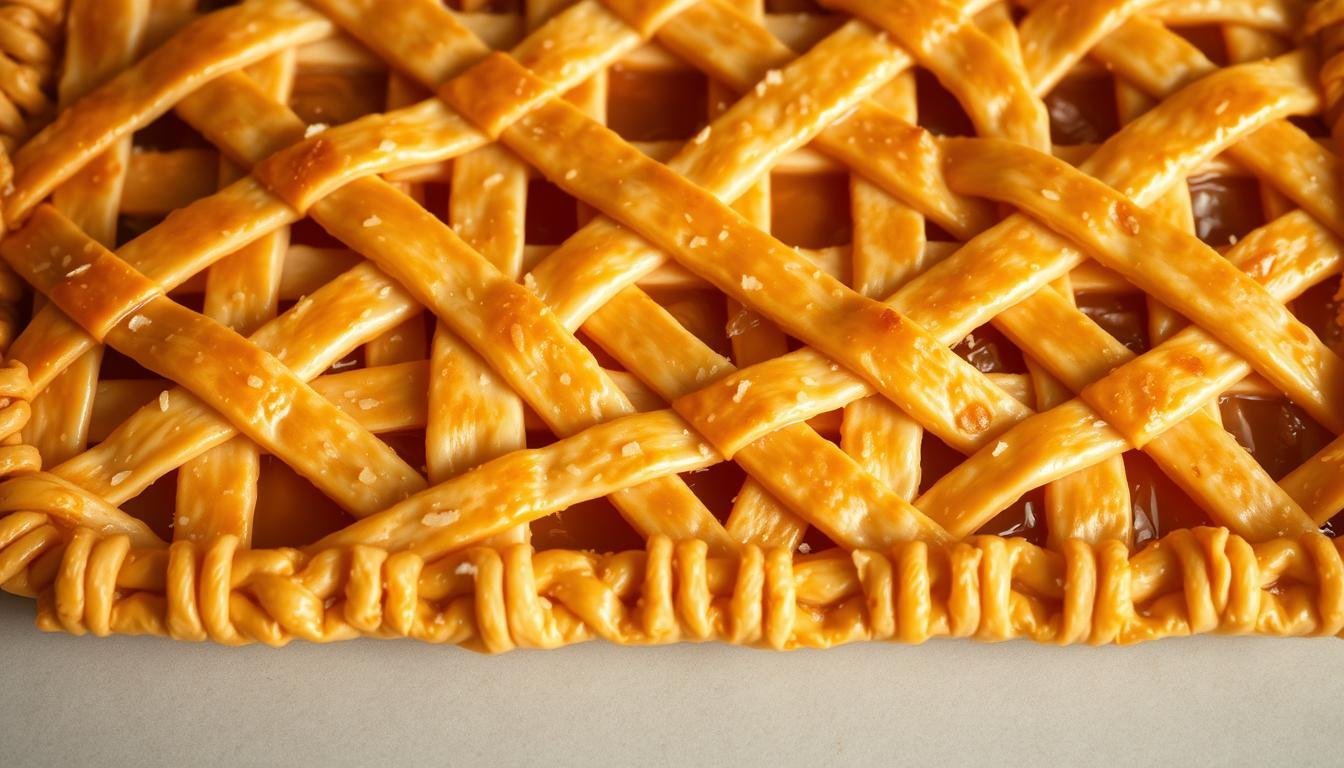
The pastry cutter method gives you precise control. By hand-cutting fats into the flour mixture, you preserve irregular butter chunks that steam into flaky pockets during baking. This technique takes 5-7 minutes but creates visible layers that food processors often homogenize.
Modern appliances streamline the process. A food processor blends cold fats and dry ingredients in 30 seconds flat. While the mixture becomes more uniform, it still produces tender results—ideal for bakers prioritizing speed over artisanal texture.
Avoiding Overmixing Pitfalls
Both methods risk overworking the dough. Stop blending when your flour mixture resembles coarse crumbs with pea-sized fat pieces. For hand mixing, use a folding motion rather than vigorous stirring. In food processors, pulse in 2-second bursts to prevent heat buildup.
Watch for these signs of perfect consistency:
- Dough holds together when squeezed
- Visible fat streaks remain
- No dry flour patches linger
Remember: Overprocessed dough feels smooth and elastic—the enemy of flaky layers. Whether you choose time-honored tools or modern shortcuts, restraint ensures tender success every time.
Keeping It Cold: Tips for Tender Pie Dough
Ever wondered why professional bakers guard their dough like treasure? Temperature control separates delicate, flaky layers from dense disappointment. The secret lies in managing every step to preserve fat integrity until baking begins.

Effective Chilling Methods
Cold butter acts as your dough’s structural engineer. When chilled fat melts during baking, it creates steam pockets that lift layers apart. Start by freezing your mixing bowl for 15 minutes before blending ingredients.
Mix ice water and dry components quickly to prevent heat transfer. If your kitchen feels warm, work on a marble slab or chilled baking sheet. Divide dough into discs immediately after forming—thinner shapes chill faster than bulky mounds.
Refrigerate dough for at least 2 hours, though overnight rest yields superior texture. Tightly wrap discs in plastic wrap to prevent drying. For urgent tasks, freeze portions 30 minutes instead—just monitor firmness to avoid cracking during rolling.
Long-term storage? Double-wrap dough in plastic, then seal in freezer bags. Label with dates to track freshness. Thaw frozen portions in the refrigerator 4 hours before use—never at room temperature. Your patience rewards you with pliable, tear-resistant pastry ready for shaping.
Rolling and Shaping Your Pie Dough
Transform your kitchen counter into a pastry workshop with precision rolling methods. The way you handle chilled dough determines whether edges stay intact or tear under pressure. Proper technique turns fragile discs into smooth sheets ready for sculpting.
Mastering the Overhang
Roll your dough 4 inches wider than the pan’s diameter—this creates enough material for decorative edges. Measure with a ruler: 1 inch of excess around the rim allows neat trimming after fitting. Use a pastry mat marked with size guides to eliminate guesswork.
Divide dough evenly for double-layer creations. Chill both portions separately to maintain firmness. Dust surfaces lightly—excess flour absorbs moisture, creating tough spots. Lift and rotate the dough quarter-turns while rolling to ensure uniform thickness.
Pressure Control Secrets
Start from the center and push outward with your rolling pin. Apply steady, medium pressure—too forceful compresses layers; too gentle leaves uneven patches. Check progress by hovering your hand beneath the sheet—it should show slight shadowing without transparency.
Transfer rolled dough by folding it over the pin like parchment. Unfurl directly into the pan, pressing gently into corners. Avoid stretching—this causes shrinkage during baking. Trim excess with kitchen shears, leaving enough to tuck under for clean edges.
Enhancing Flakiness with Butter and Shortening
The secret to a perfect pastry lies in balancing two key fats. Butter delivers rich flavor and creates air pockets through steam, while shortening ensures tender texture without greasiness. Together, they form a dynamic duo that solves common baking frustrations.

- Butter contains 20% water—when baked, this moisture evaporates, lifting layers apart
- Shortening’s pure fat content coats flour particles, limiting gluten formation
- The half-and-half ratio prevents shrinkage while maximizing flavor
All-butter doughs often crack during rolling, while all-shortening versions lack depth. By splitting fats evenly, you gain pliable dough that holds intricate designs. Chill both ingredients before mixing—cold fats create distinct layers as they melt at different rates.
Cut butter into pea-sized chunks first, then add shortening in smaller pieces. This staggered approach ensures even distribution. Your finished crust will showcase visible flakiness while maintaining structural integrity under juicy fillings.
Pro tip: For extra-tender results, freeze shortening 15 minutes before blending. The colder your ingredients, the more defined your layers become. This method transforms basic dough into bakery-quality creations that impress even seasoned bakers.
Blind Baking Essentials for a Golden Crust
The final defense against soggy bottoms lies in mastering oven preparation. This technique creates a sturdy base for delicate fillings while maintaining crisp texture. Professional bakers use it for everything from silken custards to airy chiffon creations.
When to Blind Bake
Reach for this method when working with uncooked fillings or liquid-heavy recipes. Custards and cream-based desserts demand fully baked shells to prevent sogginess. For fruit fillings with excess moisture, partial pre-baking adds crucial structural support.
Using Pie Weights Effectively
Start by chilling your shaped dough 30 minutes before heating the oven to 375°F. Line the shell with parchment, then add ceramic weights or dried beans—they press the base flat as it cooks. Bake 15 minutes, then carefully lift the parchment and weights out.
Return the empty shell to the oven for 7-12 minutes based on your recipe’s needs. Watch for golden edges and a matte surface—these signal perfect doneness. Your pastry base will emerge crisp, level, and ready for any filling you dream up.
Time-Saving Tips and Freezing Techniques
Smart bakers know preparation is half the battle. Streamline your process with strategies that let you bake on your schedule while maintaining quality. A well-organized freezer becomes your secret weapon for spontaneous dessert creations.
Make-Ahead Strategies
Mix dough batches during downtime. Wrap discs tightly in plastic wrap—they’ll keep in the refrigerator 5 days. For longer storage, freeze portions up to 6 weeks. Label each with dates using waterproof markers.
Pre-rolled sheets save precious minutes. Line pans with dough, then layer parchment between each crust before freezing. Stored this way, they’re ready to bake straight from the freezer in 10-15 minutes—no thawing needed.
Organize recipes by freezing time. Custard fillings work best with fresh dough, while fruit-based creations handle pre-baked shells beautifully. With these techniques, you’ll always have time to make pie magic happen—even on hectic days.
FAQ
What ingredients are essential for a flaky dough?
Use all-purpose flour, cold unsalted butter or shortening, a touch of cider vinegar, and ice water. Salt balances flavor, while fat ensures tenderness.
Why add vinegar to the mixture?
It prevents gluten overdevelopment, resulting in a tender texture. A teaspoon also neutralizes any metallic taste from hard water.
Can you use a food processor instead of a pastry cutter?
Yes, but pulse in short bursts to avoid overmixing. Traditional tools offer more control, while modern appliances save time.
How long should you chill the mixture before rolling?
Refrigerate for at least 30 minutes. For make-ahead strategies, freeze it for up to 3 months wrapped in plastic.
How do you prevent sticking when shaping?
Lightly dust the surface and rolling pin with flour. If the butter softens, return the dough to the refrigerator briefly.
What’s the role of butter versus shortening?
Butter enhances flavor and creates layers, while shortening provides structure. A 50/50 blend often yields the best results.
When is blind baking necessary?
Use this method for custard-based fillings or recipes with wet ingredients. It ensures the base stays crisp during baking.
Can you prepare the dough in advance?
Absolutely. Store wrapped tightly in the refrigerator for 2 days or freeze for longer storage. Thaw overnight before using.