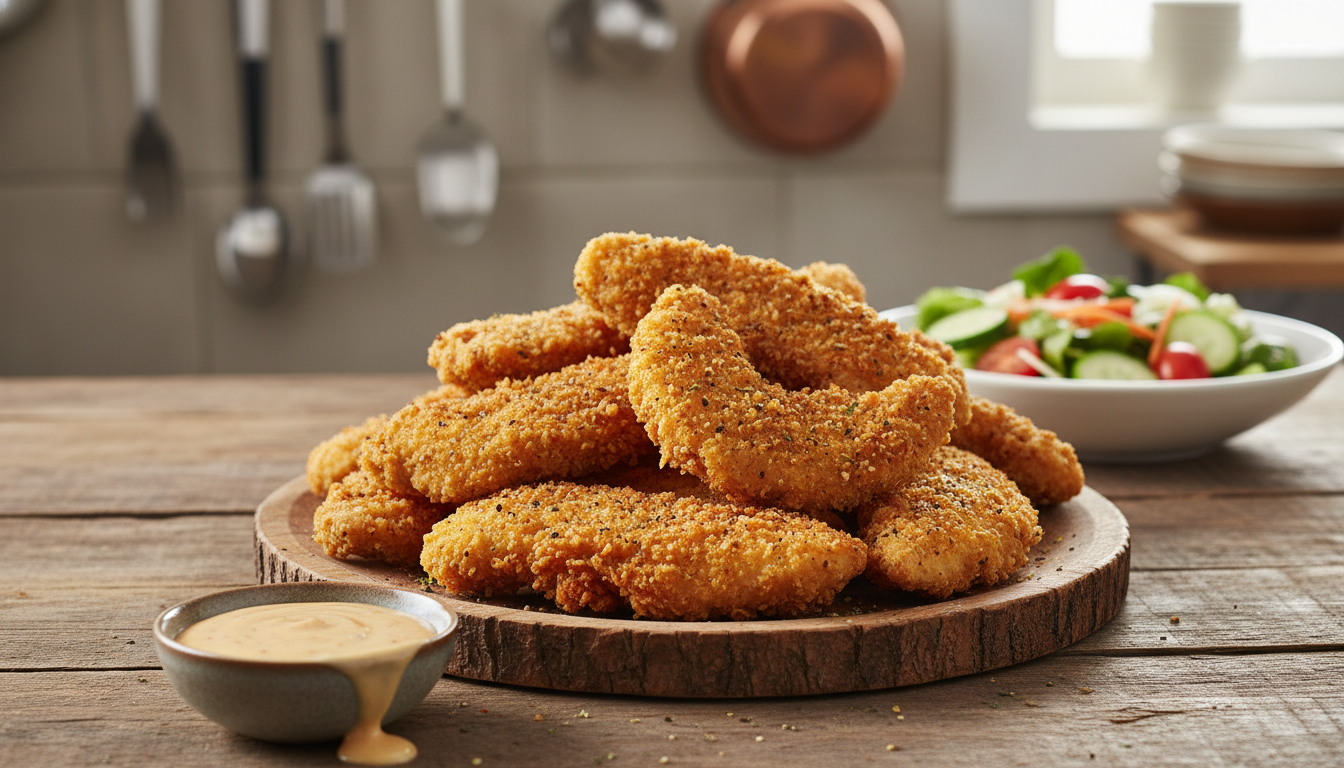
There’s something magical about biting into a perfectly crispy piece of chicken! 🐔✨ It takes me back to family dinners where the crunch was just as important as the flavor. I’m genuinely excited to share my favorite recipe with you, it’s all about that satisfying crunch and juicy goodness!
Whether you’re a newbie in the kitchen or a seasoned pro, this guide is for you. We’ll explore every step of the process, from marinating to frying and even baking. Don’t worry if you’ve had kitchen mishaps before; I’ve been there too! 😅 I’ll share some of my own stories, so you know you’re not alone.
By the end of this journey, you’ll be ready to impress your family with crispy, delicious chicken. I promise to keep things simple and fun, using everyday ingredients and clear instructions. Let’s dive into the world of crispy chicken together, your taste buds will thank you!
Table of Contents
Understanding the Appeal of Crispy Chicken Tenders
Nothing compares to the delight of enjoying a crispy, juicy piece of fried goodness! These delicious strips have become a staple for many, and it’s easy to see why. They are the ultimate comfort food that appeals to both kids and adults alike. From weeknight dinners to game-day spreads, they fit perfectly into any occasion!
What truly makes these fried chicken strips irresistible is the contrast between the shatteringly crispy coating and the tender, juicy meat inside. This combination keeps everyone coming back for more. Plus, chicken tenderloins are naturally the perfect size for finger food, making them ideal for dipping and snacking without any fuss!
Now, let’s dive into the science behind that delightful crunch! It all comes down to moisture control, proper breading techniques, and the right cooking temperature. When you make them at home, you can achieve a flavor and texture that far surpasses anything from a drive-thru. Trust me, the satisfying crunch of homemade chicken tenders is unbeatable!
These strips are not just about taste; they are incredibly versatile too! They pair beautifully with everything from salads to mac and cheese. Even picky eaters can’t resist a plate of perfectly golden fried chicken tenders fresh from the skillet. The secret lies in the buttermilk marinade and seasoned flour, which work together to create layers of flavor that penetrate deep into the meat.
This section lays the groundwork for everything else we’ll explore. Once you understand what makes these chicken tenders so irresistible, you’ll be even more motivated to master the techniques ahead. So, let’s get ready to create some magic in the kitchen!
Essential Ingredients for Perfect Crispy Chicken Tenders
Let’s explore the key components that make up the ultimate crispy chicken experience! It all starts with the star of the show: the chicken itself. You have two fantastic options here: tenderloins or chicken breasts. Each has its unique benefits, and I can’t wait to share them with you!
Choosing the Right Chicken Cuts
Tenderloins are naturally more tender and perfectly portioned for frying. They cook quickly and deliver that juicy bite we all love. However, if you prefer a bit more control over the size and thickness of your strips, chicken breasts are the way to go! I’ll show you how to slice them evenly so everything cooks at the same rate.
Key Ingredients: Flour, Panko, Spices, and Buttermilk
Next up, let’s talk about the essential pantry ingredients you need. You’ll want all-purpose flour as your base, panko breadcrumbs for that extra crunch, and buttermilk for the marinade. The combination of these ingredients creates a light, crispy crust that’s simply irresistible!
Importance of Fresh Spices
Now, don’t overlook the spices! Fresh garlic powder, paprika, black pepper, and salt are non-negotiable here. Using fresh spices makes a noticeable difference in flavor. Stale spices can leave your chicken tasting flat, so make sure to check the dates in your cabinet!
Eggs also play a crucial role in helping the breading stick. I’ll share tips on how to use them effectively in your coating process. And let’s not forget about buttermilk! It tenderizes the meat while adding a subtle tangy flavor that perfectly balances the crispy coating.
This section is all about setting yourself up for success with the right ingredients before you even turn on the stove. And remember, panko breadcrumbs are widely available in the Asian section of most supermarkets. They might cost a bit more, but trust me, they’re worth it for that superior crunch!
Marinating Your Chicken Tenders for Maximum Flavor and Tenderness
Transforming your chicken into a flavor-packed delight starts with the right marinade! This crucial step can elevate your dish from ordinary to extraordinary. Let’s dive into the world of marinating and discover how to make your chicken irresistibly juicy and flavorful!
First off, let’s talk about buttermilk. This magical ingredient has a unique acidity that gently breaks down proteins in the meat. As a result, you get chicken that is incredibly tender and juicy. Not only does buttermilk tenderize, but it also acts as a flavor carrier. It helps the spices penetrate deep into every tenderloin, ensuring that every bite is bursting with flavor!
Benefits of Buttermilk in Marinades
Buttermilk is truly a game-changer! Here’s why:
- Tenderizes the meat: The acidity breaks down tough proteins.
- Flavor infusion: It allows spices to soak in, enhancing taste.
- Juiciness: Keeps the chicken moist during cooking.
Seasoning the Marinade: Salt, Cayenne, Garlic Powder, and Paprika
Now, let’s spice things up! My go-to marinade includes a blend of salt, cayenne pepper, garlic powder, and paprika. This combination gives the chicken a warm, savory backbone that complements its natural flavor.
Here’s how to set it up:
- In a large zip-top bag, combine buttermilk, paprika, garlic powder, cayenne, and salt.
- Add your chicken, ensuring it’s well-coated.
- Seal the bag and refrigerate.
Pro tip: Always place that bag in a bowl before refrigerating. Leaks happen, and nobody wants to clean raw chicken juice out of the fridge!
Marinating Time and Tips for Best Results
Timing matters here! I recommend at least 4 hours of marinating time. However, if you can plan ahead, letting it sit overnight or up to 24 hours makes a noticeable difference in flavor. Don’t rush this step! The marinating time is what separates good chicken from great ones.
But be careful! If you marinate too long, you might end up with mushy meat. So, keep an eye on the clock and enjoy the process of building layers of flavor right from the start!
| Marinating Time | Flavor Impact | Texture |
|---|---|---|
| 4 Hours | Good | Juicy |
| 12 Hours | Better | Very Juicy |
| 24 Hours | Best | Extremely Juicy |
This section gives you all the confidence you need to nail the marinating process and create the most delicious chicken you’ve ever made. Let’s get cooking!
Preparing the Perfect Breading and Coating for Crispiness
The journey to achieving that crispy, golden crust begins with the right preparation! Now we’re getting to the really fun part — building that incredible crispy coating that makes chicken strips so addictive! I’ll show you how to season your flour properly so every layer of the breading is packed with flavor.
Seasoning Your Flour: Salt, Pepper, and Spices
Start by grabbing a large bowl. In it, whisk together flour, baking powder, salt, pepper, garlic powder, and paprika. This combination will ensure that every bite of your chicken is bursting with flavor!
Creating a Light, Crunchy Batter with Flour and Baking Powder
The secret to an ultra-crunchy coating is creating those little clumpy bits in the flour mixture. Just add a splash of buttermilk and stir with a fork until the mixture is evenly clumpy. These little bits of damp flour create an extra crunchy coating when fried!
Using Panko and Toasting Breadcrumbs for Added Crunch
Next, let’s talk about panko breadcrumbs! I’m going to share the game-changing trick of toasting your panko before coating the chicken. This step alone takes the crunch factor to a whole new level! Toasting enhances their flavor and ensures that you get that satisfying crunch with every bite.
Here’s how to set up your breading station:
- In one bowl, have your seasoned flour ready.
- In another bowl, beat a couple of eggs until smooth.
- In a third bowl, place your toasted panko breadcrumbs.
When you’re ready to coat, use one hand for the wet ingredients and the other for the dry. This technique keeps you from ending up with more breading on your fingers than on the chicken!
Don’t forget to press the chicken firmly into the breading. Those clumps need to really adhere to the strips for maximum crispiness. Letting the breaded chicken rest for about 5 minutes before cooking allows the coating to set, preventing it from falling off in the oil or oven.
This section covers both traditional flour-based breading and panko options so you can choose your own crispy adventure. By the end, you’ll have all the techniques you need to create a coating that stays put and delivers that satisfying crunch with every single bite!
| Ingredient | Purpose |
|---|---|
| Flour | Base for coating, adds structure |
| Baking Powder | Creates a lighter, airier crust |
| Salt | Enhances flavor |
| Pepper | Adds a bit of heat |
| Garlic Powder | Boosts flavor profile |
| Panko Breadcrumbs | Provides extra crunch |
Step-by-Step Guide to Frying Chicken Tenders
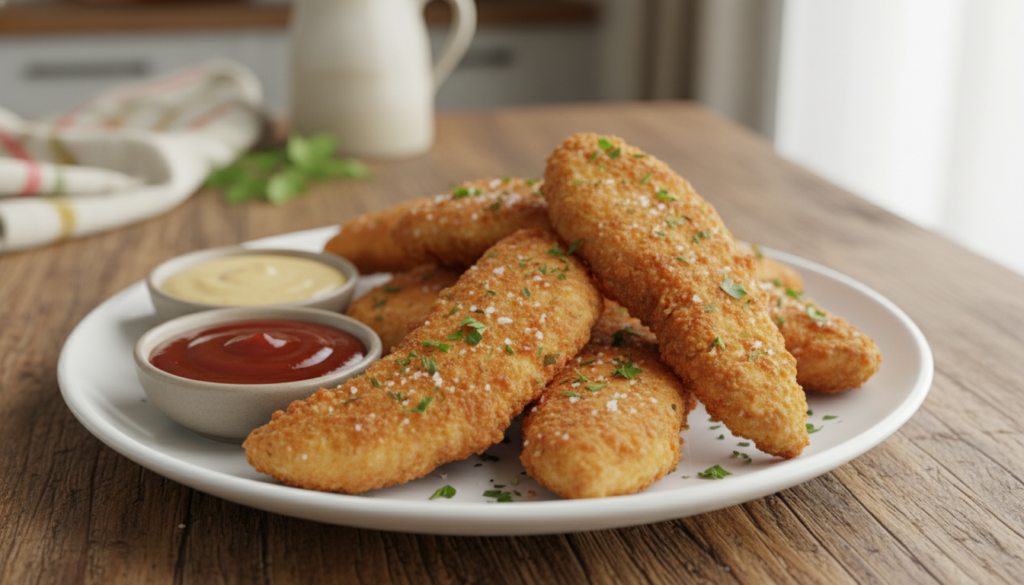
Ready to take your frying skills to the next level? Let’s dive into how to fry those delicious strips perfectly! 🥳 Frying can be intimidating, but with the right approach, you’ll master it in no time. I’ll walk you through everything from choosing the right oil to knowing when your strips are perfectly golden brown!
Choosing the Right Oil and Skillet
First things first, let’s talk about the tools you need! I’m a huge fan of cast iron skillets for frying. They hold heat incredibly well, ensuring that your oil stays at the right temperature for crispy results. Fill your skillet with about 2 inches of oil. You can also use a standard skillet if that’s what you have on hand.
When it comes to oil, you want something with a high smoke point. Vegetable oil, canola oil, or peanut oil are great choices. They won’t burn at frying temperatures, which is essential for perfect fried chicken!
Maintaining Proper Frying Temperature
Temperature control is everything! Aim for that sweet spot between 365°F and 375°F. This is crucial for achieving that golden brown crust. If you don’t have a thermometer, here’s a quick trick: sprinkle a tiny bit of flour into the oil. If it sizzles immediately, you’re ready to fry!
Tips for Coating Adherence and Cooking in Batches
Now, let’s talk about frying in batches. Overcrowding the pan is a big no-no! It drops the oil temperature quickly, leading to greasy, soggy strips instead of crispy perfection. I recommend cooking about 5 pieces at a time. Each batch should take about 3-5 minutes per side.
Don’t forget to let the breaded strips rest for a few minutes before frying. This helps the coating adhere better, ensuring that you get that satisfying crunch!
How to Know When Your Chicken is Perfectly Golden and Cooked
It can be tricky to judge the color while the chicken is submerged in oil. Here’s a pro tip: pull one tender out and rest it on paper towels to see the true shade. You’re looking for that perfect golden brown color!
And remember, safety first! Never walk away from the pan while frying. Keep a lid nearby, just in case, and always stay alert. Hot oil demands respect!
| Cooking Time | Batch Size | Desired Color |
|---|---|---|
| 3-5 Minutes | 5 Pieces | Golden Brown |
| 8-10 Minutes | 10 Pieces | Deep Golden Brown |
| 5-7 Minutes | 4 Pieces | Light Golden Brown |
By the end of this section, you’ll feel confident managing your skillet, maintaining the right oil temperature, and frying up batch after batch of beautiful strips. Let’s get cooking! 🍳
Baking Chicken Tenders: A Healthier Alternative Without Losing Crispiness
If frying isn’t your thing, baking can be a fantastic alternative! You can achieve that gorgeous golden brown crunch without all the oil. This method is not only healthier but also incredibly simple. Let’s dive into how to make your chicken strips crispy and delicious in the oven!
The absolute game-changer for baked chicken strips is toasting your breadcrumbs before they ever touch the chicken. This simple step creates incredible crispiness in the oven. I’ll walk you through exactly how to toast panko or regular breadcrumbs in a dry pan until they’re lightly golden and ready to cling to your chicken strips.
Prepping and Toasting Breadcrumbs for Baking
Toasting your breadcrumbs is easy! Just heat a dry skillet over medium heat. Add your panko or regular breadcrumbs and stir them frequently. You want them to turn a lovely golden brown. This step adds flavor and texture that will make your baked chicken tenders irresistible!
Setting Oven Temperature and Baking Time for Golden Brown Results
Setting the right oven temperature is crucial. I recommend around 390°F to 400°F to get that exterior crispy while keeping the inside juicy and tender. Bake your strips for about 15-20 minutes, depending on their thickness. Don’t forget to flip them halfway through for even browning!
Make-Ahead and Storage Tips Before Baking
Make-ahead tips are a lifesaver for busy weeknights! You can toast the breadcrumbs and get the chicken in its batter up to 2 days in advance. Just store the breaded, unbaked chicken tenders in the fridge for up to 24 hours so you can pop them straight into the oven when you’re ready. A wire rack placed on top of a baking sheet is your best friend here. It allows hot air to circulate all around the coating for maximum crispiness.
This method uses significantly less fat than traditional frying, making it a great option when you’re looking for a lighter take on classic chicken strips. You’ll also learn how to tell when baked chicken strips are done without drying them out. A quick-read thermometer is a handy tool for this!
By the end of this section, you’ll see that baking doesn’t mean sacrificing texture. You can absolutely achieve crispy, crunchy perfection right in your oven!
| Oven Temperature | Baking Time | Tip |
|---|---|---|
| 390°F | 15-20 Minutes | Flip halfway for even browning |
| 400°F | 15-20 Minutes | Use a wire rack for maximum crispiness |
| 350°F | 20-25 Minutes | Check with a thermometer for doneness |
Delicious Sauce Pairings to Complement Crispy Chicken Tenders
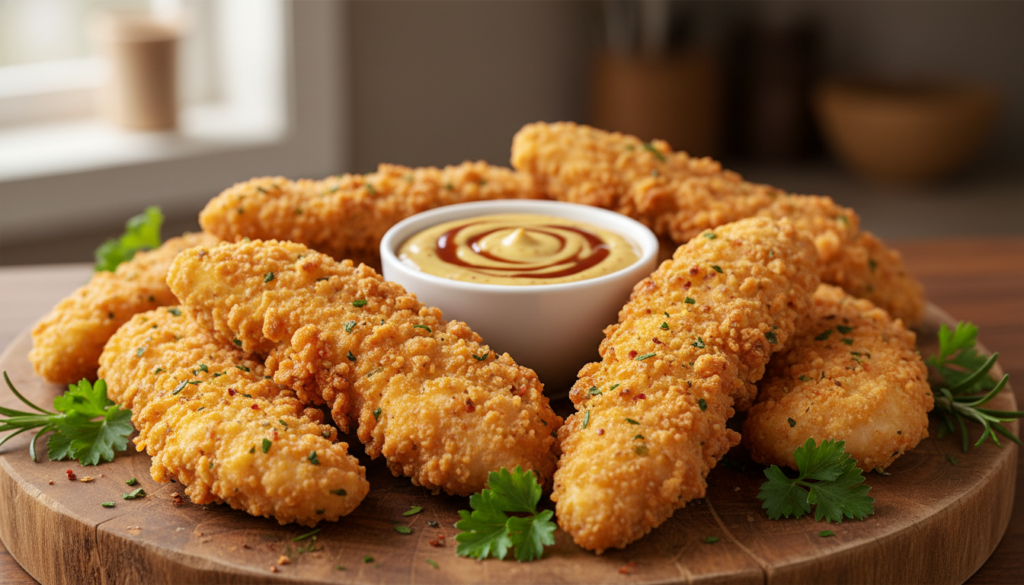
Let’s talk about the incredible world of sauces that can elevate your crispy chicken experience! Sauces are the secret weapon that can take your crispy chicken from good to unforgettable! I’m excited to share some of my absolute favorites that will make your homemade chicken feel like a gourmet meal!
Honey Mustard Dipping Sauce Recipe
This honey mustard dipping sauce is a breeze to whip up and adds the perfect sweet and tangy flavor to your crispy chicken. Here’s how to make it:
- Mix together 1/3 cup mayonnaise, 2 tablespoons Dijon mustard, and 2 tablespoons honey.
- Add 1-2 teaspoons lemon juice, then season with salt and pepper to taste.
The balance of sweet and tangy in this honey mustard is absolutely perfect! It complements the savory, crispy coating on the chicken without overpowering it.
Classic Ranch Sauce with Variations
Ranch sauce is another must-have! Here’s how to make it from scratch:
- Combine 1/4 cup mayonnaise (preferably whole egg) and 1/4 cup sour cream.
- Add 2 tablespoons milk and 1 teaspoon lemon juice or white vinegar.
- Mix in 1/4 teaspoon each of dried parsley, dill, and chives, along with 1/8 teaspoon garlic powder, salt, and black pepper.
Don’t worry if you don’t have every herb for the ranch! You can adapt the recipe using whatever dried or fresh herbs you have on hand. Just double the quantity for fresh herbs!
Other Popular Dips and Serving Suggestions
We can’t forget about other delicious dipping options! Think BBQ sauce, spicy sriracha mayo, or even a creamy buffalo sauce for those who like a little heat. These sauces can turn your crispy chicken into a full meal!
For serving suggestions, pile those crispy strips on salads or serve them alongside crispy fries or coleslaw. Each sauce recipe includes exact measurements in cups and teaspoons, so you can whip them up without any guesswork!
A little sugar in the honey mustard and a pinch of garlic powder in the ranch make all the difference in building layers of flavor in every dip. By the end of this section, you’ll have a repertoire of sauce recipes that make your homemade chicken feel like a restaurant-quality experience!
Storing, Reheating, and Freezing Chicken Tenders for Convenience
Leftover chicken strips can be just as tasty if you know how to handle them correctly! 🥳 Let’s talk about the best practices for storing, reheating, and even freezing these delicious bites so you can enjoy them later without losing that incredible crunch.
First up, let’s cover how to store your cooked chicken strips in the refrigerator. To keep them from getting soggy, place them on a plate lined with paper towels. This helps absorb any excess moisture. Cover them loosely with foil or plastic wrap to keep them fresh. Remember, they can last for about 3-4 days in the fridge!
Best Practices for Refrigeration and Holding
When you’re cooking in batches for a crowd, keeping your chicken strips warm is key. Set your oven to a low temperature, around 200°F. This will keep them warm without drying them out. Just place them on a wire rack over a baking sheet to allow air circulation!
Reheating Tips to Maintain Crispiness
Now, let’s talk about reheating! The best way to bring back that crispy coating is to pop them in the oven. Preheat it to 390°F and let your chicken strips warm up for just 3 to 5 minutes. This method revives that crunchy goodness, unlike a microwave, which tends to make everything soft and sad. 😢
Freezer-Friendly Instructions and How to Reheat Frozen Tenders
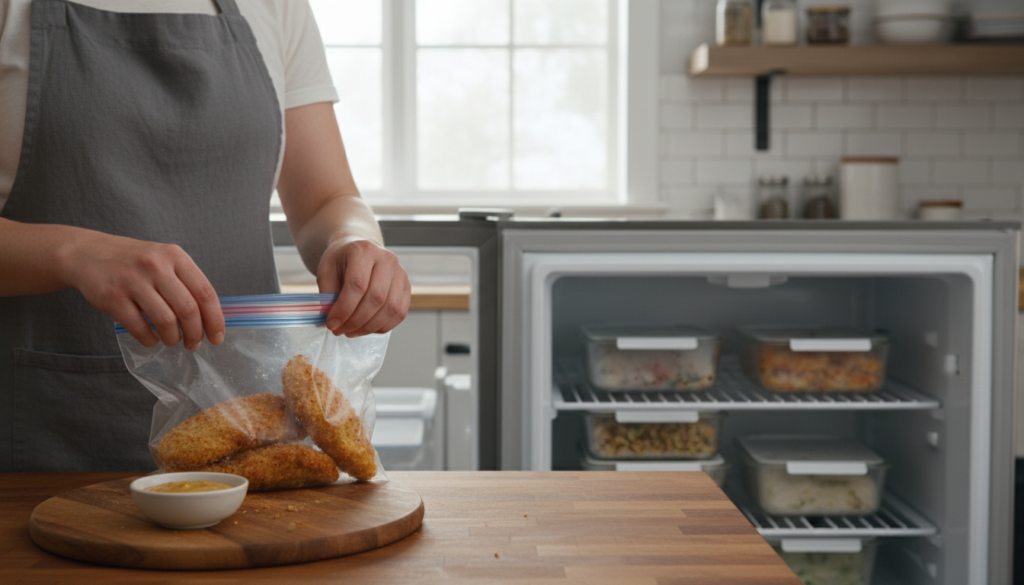
If you want to make ahead, cooked chicken strips can be frozen for up to 3 months. Just make sure they are fully cooked before freezing! To reheat frozen strips, place them directly on a wire rack over a rimmed baking sheet. Bake at 350°F for about 25 minutes, flipping halfway through. This will keep them crispy and delicious!
Freezing raw breaded chicken strips doesn’t work well, as the coating can become weird and the texture suffers. Always cook them first if you plan to freeze. And don’t forget to store any leftover dipping sauces separately to keep everything fresh and ready for round two!
With these storage and reheating tips, you’ll never have to worry about wasting a single tender. Every last one can stay crispy and delicious, ready for your next meal! 🍽️
Nutritional Information and Health Considerations
Let’s dive into the nutritional details that make these crispy delights a tasty yet mindful option! Understanding what goes into your food can help you enjoy it without any guilt. So, here’s a breakdown of the nutrition facts for a typical serving of these delicious strips.
Calorie, Protein, Fat, and Sodium Breakdown
A typical serving of fried chicken strips (about 3 pieces) contains around 253 calories. That’s not too bad, right? Plus, you get a solid 24 grams of protein, making these strips a great source of lean protein from that chicken breast meat.
The fat content varies depending on your cooking method. Fried versions absorb some oil during cooking, leading to about 4 grams of total fat. In contrast, baked options come in significantly lower. Pay attention to sodium levels as well! Each serving has around 467 mg of sodium, which is worth noting if you’re watching your salt intake.
Understanding Saturated Fat, Fiber, and Cholesterol Content
Now, let’s talk about the saturated fat content. Each serving has about 1 gram, which is relatively low. This means you can enjoy your crispy strips without worrying too much about saturated fat. The cholesterol content is moderate, sitting at around 91 mg, so it fits into a balanced diet if you’re mindful of your overall intake.
As for fiber, it comes primarily from the flour and breadcrumb coating. While it’s not a huge amount (about 1 gram), every little bit counts toward your daily goals!
Balancing Flavor with Nutritional Goals
Understanding the nutrition facts helps you balance indulgence with your health goals. I’m all about enjoying delicious food mindfully! Here are some tips for lightening up the recipe without sacrificing flavor:
- Use less oil when frying or opt for baking instead.
- Consider choosing whole wheat flour for added fiber.
- Control the seasoning to manage sodium levels better.
This section isn’t about guilt; it’s about giving you the information you need to make the best choices for your lifestyle while still enjoying every crispy bite. Whether you’re counting calories, tracking protein, or just curious about what’s in your food, I’ve got the detailed nutrition breakdown right here for you!
| Nutrient | Per Serving (3 Pieces) |
|---|---|
| Calories | 253 kcal |
| Protein | 24 g |
| Fat | 4 g |
| Saturated Fat | 1 g |
| Cholesterol | 91 mg |
| Sodium | 467 mg |
| Fiber | 1 g |
Conclusion: Mastering Crispy Chicken Tenders Every Time
There’s nothing quite like the satisfaction of mastering the art of crispy bites! 🥳 I hope you’re feeling excited and ready to create the best chicken tenders of your life!
From selecting the right cuts to perfecting the marinade and achieving that golden crust, you now have all the tools you need. Remember, practice makes progress. Your first batch might not be perfect, and that’s okay! Each attempt teaches you something new.
This recipe is incredibly adaptable. Feel free to switch up the spices or try different dipping sauces. Cooking should be fun and enjoyable! Whether for a weeknight dinner or a party spread, you’ve got this!
I’d love to hear how your chicken tenders turn out. Keep this guide handy for tips on frying temperatures, marinating times, and that perfect honey mustard sauce. The little details, like toasting breadcrumbs and monitoring oil temperature, are what elevate good tenders to great ones.
Thank you for joining me on this delicious journey. Here’s to perfectly crispy, juicy, irresistible chicken tenders every single time! 🍽️
FAQ
What is the best way to ensure my chicken tenders are crispy?
Can I bake chicken tenders instead of frying them?
How do I store leftover chicken tenders?
What dipping sauces pair well with chicken tenders?
How can I make my chicken tenders more flavorful?
What is the nutritional content of chicken tenders?
Reviews
There are no reviews yet. Be the first one to write one.