You put your heart into preparing a beautiful dinner. The table is set, the sides are ready, and you pull the main course from the oven with high hopes. Then comes that sinking feeling. Instead of being juicy and tender, your poultry is tough and disappointing.
If this has happened to you, take a deep breath. You are not alone, and your meal is not a lost cause. Understanding why this happens is the first step to fixing it, even while it’s still cooking.
This guide will walk you through the simple science behind moisture loss. We will identify common mistakes and give you practical, real-time solutions to rescue your dinner. You will learn how a few smart adjustments can transform your main course into a succulent, flavorful triumph.
Say goodbye to that familiar kitchen frustration. Let’s get you the confidence to serve a perfectly cooked dish that everyone will love.
Understanding the Science Behind Chicken Dry Out
Understanding what happens at the cellular level can revolutionize your cooking results. The biological process behind moisture loss is actually quite simple once you grasp the basics.
Muscle Fiber Contraction and Moisture Loss
When you heat poultry, the muscle fibers undergo a remarkable transformation. As temperature increases, these fibers contract tightly, much like squeezing a sponge.
This contraction physically forces out the natural juices that keep your meal tender. On a microscopic scale, thousands of individual fibers work simultaneously to expel precious moisture.
The Importance of Resting Your Chicken
After cooking, the resting period is just as critical as the heating process. During these 10-20 minutes, the muscle fibers relax and reabsorb much of the lost liquid.
Think of this as giving your poultry a chance to naturally rehydrate itself. The relaxed fibers act like sponges, soaking up redistributed juices that would otherwise end up on your cutting board.
| Technique | Muscle Fiber Behavior | Moisture Result | Final Texture |
|---|---|---|---|
| Proper Resting | Fibers relax and reabsorb | Juices retained internally | Juicy and tender |
| Immediate Cutting | Fibers remain contracted | Juices escape rapidly | Tough and dry |
| Correct Temperature | Controlled contraction | Optimal moisture retention | Perfectly cooked |
Mastering this biological process gives you incredible control over your final results. For more detailed insights into preventing moisture loss, explore our comprehensive guides.
Common Culprits Behind Chicken Dry Out

The journey from succulent to rubbery often stems from a few key mistakes in the kitchen. Most issues with your poultry’s texture trace back to how you manage heat and timing.
Getting these elements wrong can turn what should be a tender meal into a disappointing experience. Let’s explore the main factors that affect your results.
Impact of Incorrect Temperature and Cooking Time
Your cooking temperature and cooking time work together like partners in a dance. When they’re not in sync, your poultry suffers.
High heat makes muscle fibers contract too quickly. This squeezes out precious moisture before the meat can properly cook.
On the flip side, too low temperature for too long breaks down the structure differently. You end up with a mushy texture that still lacks juiciness.
How Overcooking Leads to Tough, Dry Meat
Overcooking is the single biggest reason poultry turns tough. Even a few extra minutes can make a huge difference.
Many people cook longer than needed due to safety concerns. But once your poultry reaches 165°F internally, it’s both safe and perfectly cooked.
Using a good thermometer helps you hit that sweet spot. This prevents transforming juicy meat into something disappointingly tough.
Preventive Techniques for Juicy Chicken

The secret to consistently moist results lies in the techniques you apply before and during the cooking process. These simple methods create a protective system that safeguards your poultry’s natural juices.
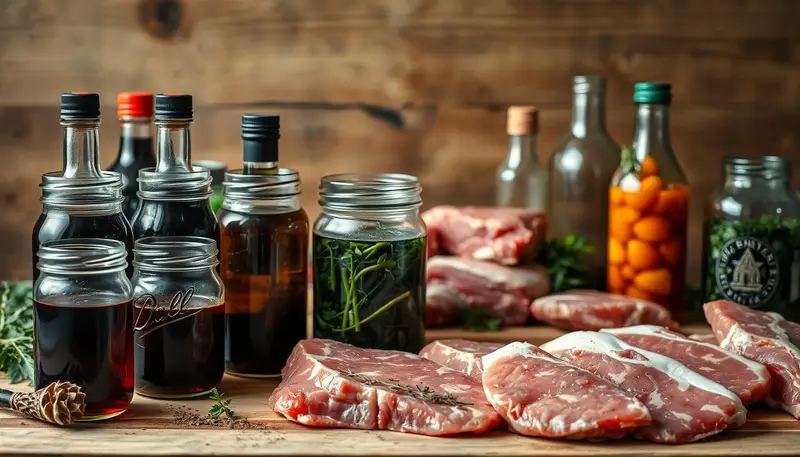
Brining, Marinating, and Basting Methods
Brining works like magic for moisture retention. Soaking your meat in a saltwater solution prepares it to hold onto precious liquids during cooking.
Even a quick 30-minute brine makes a noticeable difference. Marinating adds flavor while introducing extra hydration to the protein structure.
During cooking, basting becomes your best friend. Regularly applying broth or butter creates a constant moisture barrier. This prevents surface dehydration that can lead to tough texture.
Selecting the Best Cooking Techniques
Cooking with the skin on provides natural protection. The skin acts as a barrier that traps steam and juices inside the meat.
This method gives you the best of both worlds. You get tender, juicy results with beautifully crisp exterior texture.
These preventive steps require minimal extra effort. Yet they deliver substantial improvements in your final dish’s quality and enjoyment.
Quick Fixes for Dry Chicken Mid-Cook

Discovering your main course has lost its juiciness can feel like a kitchen disaster, but it’s actually a chance for culinary creativity. You don’t have to serve a disappointing meal. A few simple tricks can completely transform your results.
This section provides immediate solutions you can apply right now. Let’s explore how to add moisture and reinvent your plate.
Moistening with Sauces and Condiments
The fastest way to revive your poultry is by introducing liquid. Sauces and condiments are your best allies here.
Shredding the meat first creates more surface area. This allows flavors to penetrate deeply. Try barbeque sauce, pesto, or a zesty mix of soy sauce and lemon juice.
These additions do more than just add moisture. They bring new, exciting flavors to your dish.
Creative Remedies to Rescue Your Dish
If a simple sauce isn’t enough, consider reinventing the meal entirely. Incorporating the protein into another recipe works wonders.
Here are some brilliant ideas to save your dinner:
- Soup it up: Add shredded meat to minestrone or a creamy broccoli cheddar soup. The broth hydrates everything.
- Pasta perfection: Toss it with your favorite pasta and sauce. The sauce coats every piece, masking any toughness.
- Quesadilla quick fix: Layer shredded poultry with cheese on a tortilla and grill until melted. It creates a whole new experience.
- Salad savior: Chop it and use it as a salad topping. The dressing and fresh greens provide the needed moisture.
You can also make a chicken salad sandwich with mayo or serve it with flavorful dips like hummus. These creative solutions ensure your effort in the kitchen is never wasted.
Tips and Tricks for Perfect Chicken Breasts
Achieving juicy chicken breasts requires a focused approach due to their lean nature. They have less fat than other cuts, so precision is your best friend. Mastering a few key techniques will give you consistently excellent results.
Using a Digital Instant-Read Thermometer
The single most important tool for perfect poultry breasts is a digital instant-read thermometer. Old-fashioned thermometers react too slowly. By the time they show 165°F, your meat is often overcooked.
A modern thermometer gives you a precise reading in just seconds. This allows you to pull the breasts from the heat at the exact perfect moment. It is the ultimate guarantee against toughness.
Enhancing Flavor with Tasty Toppings
If you don’t have a thermometer, a flavorful topping provides excellent insurance. A simple mayo-based mixture creates a protective seal that locks in moisture as it bakes.
You can customize these toppings to your taste. Try a spicy blend with lemon and paprika, or an Italian Parmesan version with breadcrumbs. A Parmesan Ranch topping is another crowd-pleasing option.
For any recipe, pat the breasts dry and season them first. Then, apply your chosen topping and bake at 425°F. This method is a fantastic way to explore high-protein chicken recipes with confidence.
The combination of precise temperature control and a moisture-sealing topping is a fail-safe system for succulent white meat every single time.
Mastering Timing and Temperature Control
Precision cooking transforms your results from unpredictable to reliably delicious. The magic number for optimal juiciness is 165°F. This target ensures safety while preserving precious moisture.
One effective option involves removing your poultry from the oven at 160-162°F. Residual heat continues the cooking process during resting. This carryover cooking brings it to the perfect 165°F without overshooting.
Achieving the Perfect 165°F for Optimal Juiciness
Your thermometer choice makes a huge difference. Digital instant-read models give accurate readings in seconds. Traditional thermometers react too slowly, often leading to overcooked results.
Typical cooking time is around 20 minutes at proper temperature. This varies based on thickness and your oven‘s actual heat. Start checking a few minutes early to prevent mistakes.
| Technique | Target Temperature | Result |
|---|---|---|
| Carryover Cooking | Remove at 160-162°F | Perfectly juicy and safe |
| Mayo-Based Topping | Cook to 165°F | Extra moisture insurance |
| High Heat (425°F) | Monitor closely | Faster cooking, needs vigilance |
Insert your thermometer into the thickest part, avoiding bone. Temperature precision eliminates guesswork. You create a foolproof system for succulent meals every time.
Conclusion
The frustration of disappointing meals can become a distant memory with these reliable methods. You now possess the complete toolkit for perfect poultry every time.
Remember the golden rules: precise temperature control and proper resting are non-negotiable. Your digital thermometer becomes your best friend in the kitchen. These simple steps ensure juicy chicken breasts and other cuts straight from the oven.
Whether using preventive techniques or creative fixes, you have multiple options for success. From brining to flavorful toppings, each method adds moisture insurance. Even if things go wrong, you can rescue any dish with confidence.
Start implementing these strategies with your next meal. Your chicken preparation will transform immediately. Consistent, delicious results are now within your reach every time you cook.
FAQ
Why does poultry become tough and lose its moisture?
The main reason is overcooking. When you cook it for too long or at a very high temperature, the proteins in the meat squeeze out all the natural juices. Using a meat thermometer is the best way to avoid this and ensure perfect results every time.
What is the ideal internal temperature for juicy white meat?
You should aim for an internal temperature of 165°F (74°C). Insert a digital instant-read thermometer into the thickest part of the breast to check. Once it hits that magic number, remove it from the heat immediately to keep it succulent.
How can I add moisture back if my dish is already dry?
A great quick fix is to add a sauce or gravy. You can also slice the cooked meat and mix it into a flavorful dish like a salad or a pasta with a creamy dressing. These methods help reintroduce moisture and improve the overall eating experience.
Does letting the meat rest after cooking really make a difference?
Absolutely! Resting for about 5-10 minutes allows the juices to redistribute throughout the meat. If you cut into it right away, those precious juices will end up on your cutting board instead of staying in the meat, making it much drier.
Are there preparation methods that help prevent dryness?
Yes! Brining (soaking in a saltwater solution) or marinating before cooking can work wonders. These processes help the muscle fibers retain more moisture during the cooking process. Basting with pan juices or butter while it’s in the oven is another effective technique.