Mastering a golden, layered bake is like preserving a culinary heirloom.
While shortening was once the standard, professional bakers have long shown that using butter creates a Flaky Pie Crust Without Shortening—light, crisp, and unforgettable.
This guide reveals seven expert steps, from temperature control to proper technique, to help every baker achieve bakery-quality pies, tarts, and quiches at home.
Table of Contents
Key Takeaways
- Butter enhances flavor and texture better than shortening when handled correctly
- Temperature management is critical for achieving light, airy layers
- Strategic mixing techniques create steam pockets for maximum flakiness
- One versatile recipe adapts to both sweet and savory dishes
- Proper resting times ensure dough stability during baking
Introduction: Embracing the All-Butter Pie Crust
Modern baking thrives on simplicity. While older recipes relied on processed fats, today’s kitchens celebrate ingredients you can pronounce. The shift toward all-butter dough isn’t just a trend—it’s a return to craftsmanship.

Why Choose an All-Butter Approach?
Butter works harder than shortening. Its 15-20% water content transforms into steam during baking, lifting layers for that signature crisp, delicate texture. Unlike shortening’s blank canvas, butter adds depth to both fruit-filled desserts and hearty meat pies.
The Benefits Over Traditional Shortening Methods
Shortening creates tenderness but sacrifices flavor. High-quality unsalted butter delivers richness while letting you control salt levels. Organic options also align with clean-eating preferences, appealing to health-conscious bakers.
| Feature | Butter | Shortening |
|---|---|---|
| Fat Content | 80-85% | 100% |
| Water Content | 15-20% | 0% |
| Flavor Profile | Rich, complex | Neutral |
| Ingredient List | Single component | Processed blend |
Temperature control is key. Chill your butter thoroughly, and you’ll achieve the same workable consistency as shortening-based doughs—with far better results. Professional kitchens have made the switch. Now it’s your turn.
Understanding the Science of Flakiness
Perfect pastry hinges on chemistry. At its core, flakiness comes from how ingredients interact under precise conditions. Two factors dominate: fat distribution and moisture control.

The Role of Cold Butter and Ice Water
Cold butter acts like tiny steam engines. When heated, its water content vaporizes, pushing dough layers apart. This creates air pockets that become delicate sheets. Ice water keeps the butter solid until baking starts, ensuring maximum lift.
Professional bakers use a “butter raincoat” method. Coat half the flour with butter first. This shields gluten-forming proteins from overactivating. Less gluten means tender layers instead of tough ones.
Gluten Development and Its Impact on Texture
Gluten gives structure but ruins flakiness if overdeveloped. Mix just until the dough holds together—visible butter chunks are good. Think of gluten as scaffolding: you need enough to support layers, not cement them.
| Step | Action | Result |
|---|---|---|
| Coating Flour | Butter coats 50% of flour | Reduces gluten formation |
| Adding Water | Ice-cold hydration | Maintains butter integrity |
| Resting Time | 30-minute chill | Relaxes gluten strands |
Balancing these elements transforms your dough from dense to divine. Remember: cold ingredients and gentle handling are non-negotiable for that professional-quality texture.
Flaky Pie Crust Without Shortening: Key Ingredients Explained
Great pastry starts with precision. Every component in your dough plays a specific role, from creating structure to enhancing flavor. Let’s break down the essentials that transform simple items into a masterpiece.

All-Purpose Flour, Salt, and Sugar Essentials
All-purpose flour forms your foundation. Its 10-12% protein content builds just enough gluten for structure without toughness. Always measure using the spoon-and-level method: lightly spoon flour into your measuring cup, then level with a knife. This prevents packing in excess—2½ cups (325g) should feel light, not dense.
Salt does more than season. One teaspoon kosher salt (or ½ teaspoon fine sea salt) amplifies butter’s richness and balances sweetness. Even savory recipes benefit from this enhancement. A tablespoon of sugar? Optional but smart—it encourages golden browning without adding noticeable sweetness.
Unsalted butter remains non-negotiable. Chilled cubes create steam pockets when baked, while letting you control sodium levels. Quality matters: higher-fat European-style options yield superior layers compared to standard grocery brands.
| Ingredient | Function | Pro Tip |
|---|---|---|
| All-Purpose Flour | Structure foundation | Weigh for accuracy |
| Salt | Flavor enhancer | Adjust based on butter saltiness |
| Sugar | Browning agent | Skip for savory pies |
Your recipe succeeds or fails here. Source fresh ingredients, handle them minimally, and watch temperature like a hawk. Cold butter + precise measurements = layers worth bragging about.
Mastering the Mixing Techniques
The difference between good and great pastry lies in how you blend the elements. Your choice of tools and timing directly impacts the final texture, turning simple ingredients into a masterpiece.

Food Processor Versus Hand Mixing
A food processor delivers precision. Pulse dry ingredients first, then add chilled butter until the mixture resembles coarse sand. This machine eliminates guesswork, coating flour evenly while keeping butter cold. Ideal for beginners, it ensures consistent results every time.
Hand mixing offers tactile feedback. Use a pastry cutter to work butter into flour, stopping when pea-sized pieces remain. This method suits experienced bakers who prefer controlling each step. Both approaches work—choose based on your comfort and equipment.
Proper Timing to Avoid Overworking the Dough
Stop mixing as soon as ingredients combine. Over-processed dough develops excess gluten, leading to toughness. Watch for visual cues: crumbs should hold together when pressed, with visible butter flecks.
If using a food processor, pulse in short bursts. For hand methods, work quickly to prevent butter from warming. Remember: imperfect blending creates those coveted steam pockets. Patience here rewards you with lightness in every bite.
Step-by-Step Pie Dough Preparation Process
Your journey to exceptional pastry begins with methodical preparation. Precision here determines whether your creation becomes a tender marvel or a tough disappointment. Let’s break down the stages that turn raw ingredients into a workable masterpiece.
Combining Dry Ingredients and Incorporating Butter
Start by whisking 2½ cups flour with 1 teaspoon salt and 1 tablespoon sugar in a large bowl. This creates an even base for flavor distribution. Add 1 cup of chilled butter cubes—each piece should resemble small dice. Use a pastry cutter or pulse in a food processor until the mixture turns pale yellow, signaling proper fat coating.
Stop when the flour clings to the butter like sand. Visible chunks are desirable—they’ll melt into steam pockets during baking. This stage requires cold hands and a watchful eye. Overmixing here leads to dense results, while underworking leaves uneven texture.
Assembling the Dough With Ice-Cold Water
Gradually drizzle 6-8 tablespoons of ice water into the bowl. Add one tablespoon at a time, tossing with a fork between additions. The mixture should hold together when squeezed but crumble slightly when pressed. Aim for a texture resembling damp beach sand—cohesive yet loose.
Pour the dough onto plastic wrap and shape it into a disk. Avoid kneading, which activates gluten. Chill for at least 30 minutes before rolling. This rest period relaxes the proteins and solidifies the butter, ensuring easy handling and maximum lift during baking.
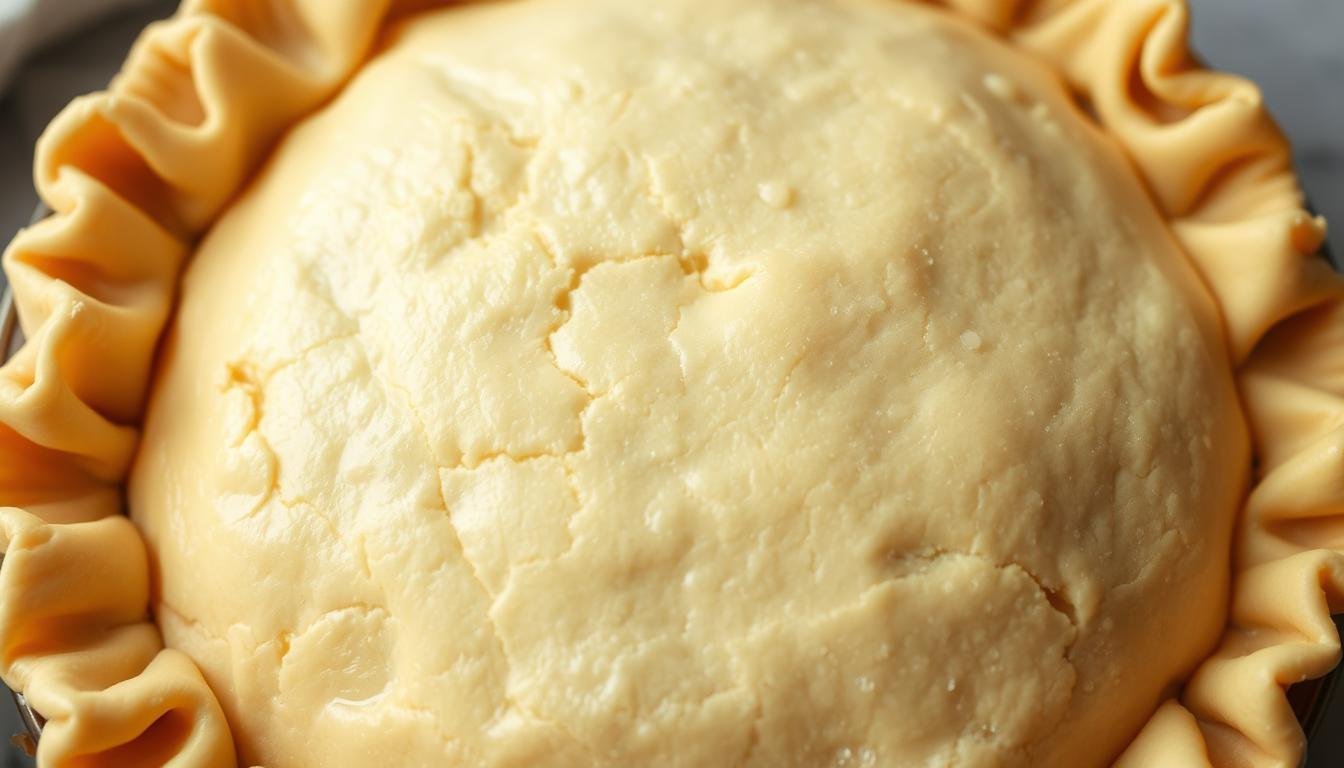
Rolling, Shaping, and Crimping Your Pie Dough
Transform your kitchen into a pastry workshop with techniques that turn dough into art. Precision here ensures your creation bakes evenly and holds its shape.

Techniques for Even Rolling
Place chilled dough between two parchment sheets. Roll from the center outward, rotating clockwise every three strokes. This maintains uniform thickness—about ⅛ inch—without flour buildup.
Test size by flipping your pie plate onto the circle. Properly rolled dough extends 2 inches beyond the dish rim. Lift it using the rolling pin: gently wrap the sheet around the pin, then unroll over the plate.
| Rolling Method | Advantage | Common Mistake |
|---|---|---|
| Parchment Sandwich | Prevents sticking | Using wax paper (melts) |
| Clockwise Rotation | Even thickness | Rolling in one direction |
| Pin Transfer | Minimizes tears | Lifting with hands |
Creative Crimping and Edge Finishing
Trim excess to 1 inch beyond the pie plate edge. Fold it under to create a double-thick border. Press with fingertips or use these professional methods:
- Fork Press: Simple lines for rustic charm
- Pinch-and-Twist: Elegant scalloped edges
- Rope Braid: Attach thin dough strips
Chill shaped crust for 15 minutes before filling. This step prevents shrinkage and keeps details crisp during baking.
Troubleshooting Common Pie Crust Issues
Even experienced bakers encounter challenges when perfecting their technique. Understanding these common pitfalls helps you address them before they ruin your creation.
Preventing a Soggy Bottom
A soggy bottom often stems from improper heat distribution. Position your oven rack in the lower third to direct heat where it’s needed most. Glass pie plates let you monitor browning progress—look for golden hues before removing.
For extra protection, brush the crust with egg wash before adding wet fillings. This creates a moisture barrier while enhancing color. Preheating your baking sheet also helps transfer heat upward through the base.
Fixes for Crumbly or Shrinking Dough
Crumbly dough usually lacks hydration. Mist dry spots with ice water using a spray bottle, then gently knead. Work quickly to avoid warming the butter—cold ingredients maintain structural integrity.
Shrinkage occurs when gluten overdevelops. Chill your dough at three critical stages:
- After mixing to relax proteins
- Post-shaping to set edges
- Pre-baking to solidify fats
If edges still pull inward, leave excess dough around the rim and trim after baking. This gives the crust room to contract without compromising shape.
Expert Tips for Achieving Consistently Flaky Results
Consistency separates good bakers from great ones. Professionals rely on meticulous methods rather than secret ingredients to create exceptional textures. Their approach transforms basic components into structured artistry through intentional technique.
Secrets from Professional Pie Makers
Top chefs chill dough at three stages: after mixing, before rolling, and post-shaping. This maintains butter integrity while preventing gluten overdevelopment. A flour-butter paste method, pioneered by test kitchens, ensures even fat distribution without heavy processing.
| Professional Technique | Amateur Mistake | Result Difference |
|---|---|---|
| Chill dough 3x | Single refrigeration | Better layer separation |
| Hand-mix butter chunks | Over-process in machine | Larger steam pockets |
| Rest 45+ minutes | Rush rolling process | Reduced shrinkage |
Temperature control proves more impactful than additives like vinegar. Use frozen butter grated into flour for faster incorporation. Test readiness by pressing crumbs—they should hold shape without feeling wet.
Focus on these methods rather than specialty products. Proper execution of fundamentals yields professional-level outcomes every time. Your creations will rival bakery standards through disciplined practice.
Baking and Blind Baking for Optimal Texture
The final act of pastry perfection happens in the oven. Blind baking—pre-baking dough before adding fillings—ensures crisp results for custard-based or juicy fruit creations. This technique prevents sogginess while maintaining structural integrity.
Techniques for Blind Baking
Start with thoroughly chilled dough rolled into your pan. Press parchment paper against the surface, then fill with ceramic weights or dried beans. Bake at 375°F for 15 minutes to set the base.
Remove weights and parchment carefully. Return the shell to the oven for 5-7 minutes until lightly golden. For extra crispness, brush the surface with egg wash during this phase.
Monitor edges to prevent over-browning. If they darken too quickly, use foil strips as shields. Proper blind baking creates a sturdy foundation that withstands wet fillings without becoming leathery.
Always preheat your oven—temperature spikes cause uneven cooking. Let the baked shell cool completely before adding ingredients. This step ensures layers stay distinct rather than merging during final baking.
FAQ
Can I substitute salted butter in an all-butter recipe?
Use unsalted butter to control sodium levels. If substituting, reduce added salt by ¼ teaspoon per cup of flour to balance flavor.
How does ice water improve texture?
Chilled liquid keeps fat solid during mixing, creating air pockets as it melts during baking. This results in layered, tender layers.
Why does overmixing cause toughness?
Excessive handling activates gluten proteins, leading to a chewy consistency. Stop blending once the dough forms pea-sized crumbs.
What’s the purpose of blind baking?
Pre-baking with pie weights or parchment-lined beans prevents a soggy bottom when filling wet ingredients like custards or fruit.
Can I prepare dough in advance?
Yes. Wrap tightly in plastic and refrigerate for up to 3 days or freeze for 3 months. Thaw overnight before rolling.
How do I fix crumbly edges?
Sprinkle 1–2 teaspoons of ice water over dry areas and gently knead. Avoid overworking to maintain flakiness.
Is a food processor necessary?
While efficient, hand-cutting butter into flour works. Use a pastry blender or two forks for similar results without specialized tools.